
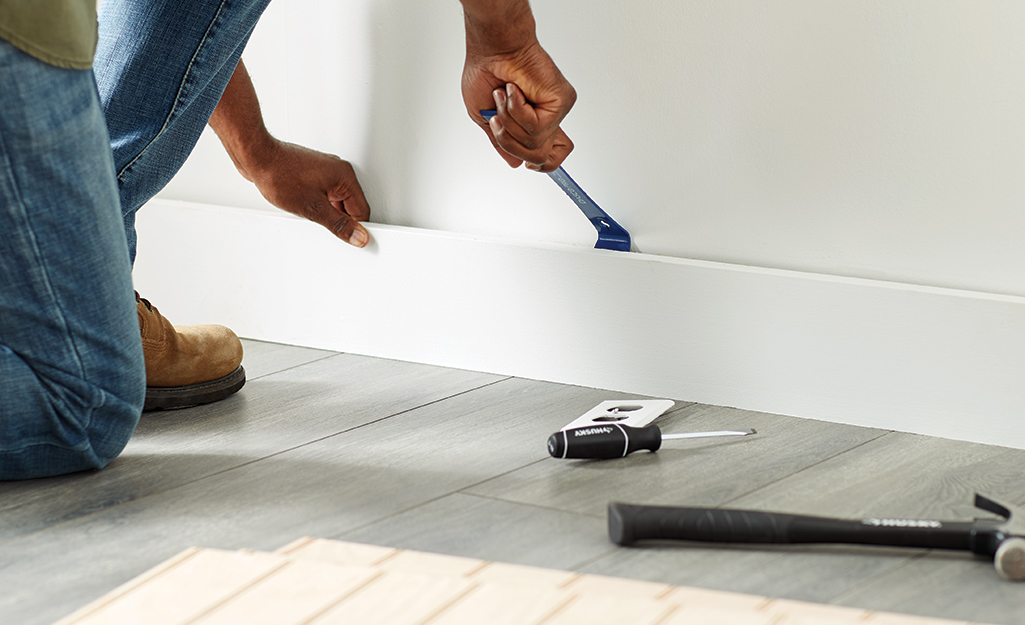
1 Prep
The first step for installing paneling is to remove all wall plates, outlets and any nails in the wall. Gently remove any crown moulding, baseboards and trim you plan to use again.
Tip: For best results, set the paneling in the room for a few days before you install it. This allows it to adjust to the humidity in a room.
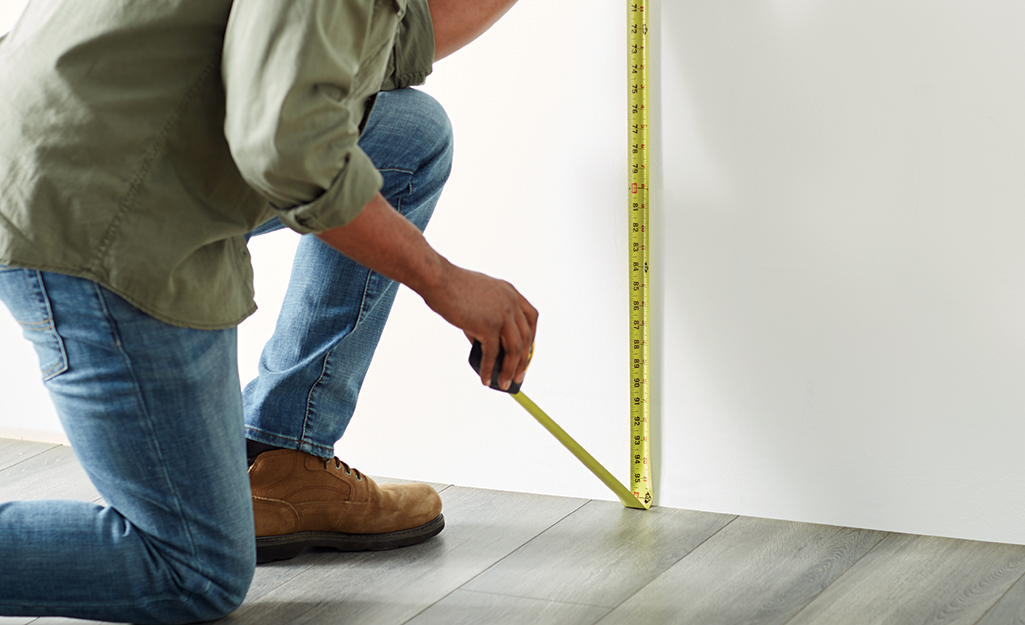
2 Measure
To install sheet paneling, determine how many sheets you will need. Measure the height and width of each wall to find its square footage. (Don’t forget to subtract the size of doors or windows.) Divide the wall length by the width of your panel sheets to get the number of sheets you'll need.
Tip: Add 10 percent to your total measurement to account for waste and match color.
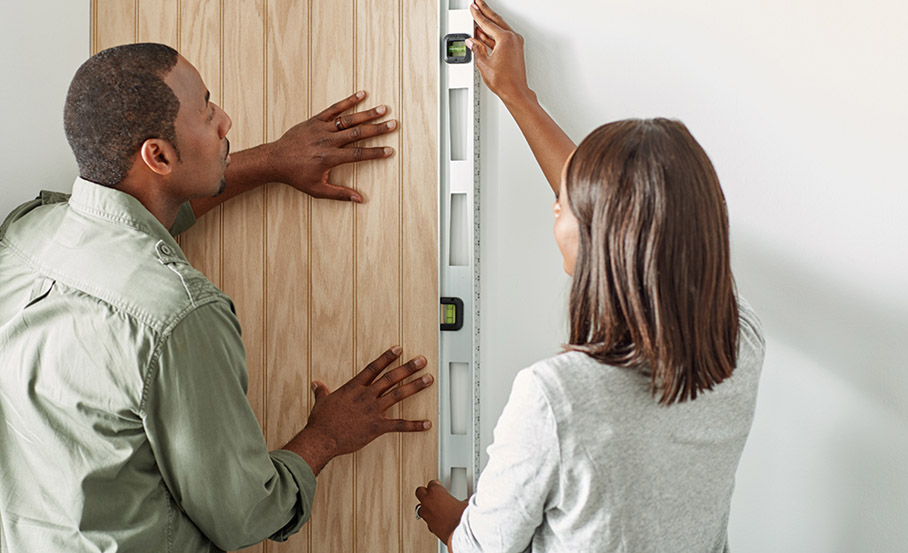
3 Level
When learning how to install paneling over drywall, it's important to know that walls are rarely straight. Be sure that your first panel is hung level so that remaining panels align correctly.
Tip: With help, position the first panel at one corner of the room, but do not apply panel adhesive yet. Check the inside edge of the panel with a level to make sure it is plumb.
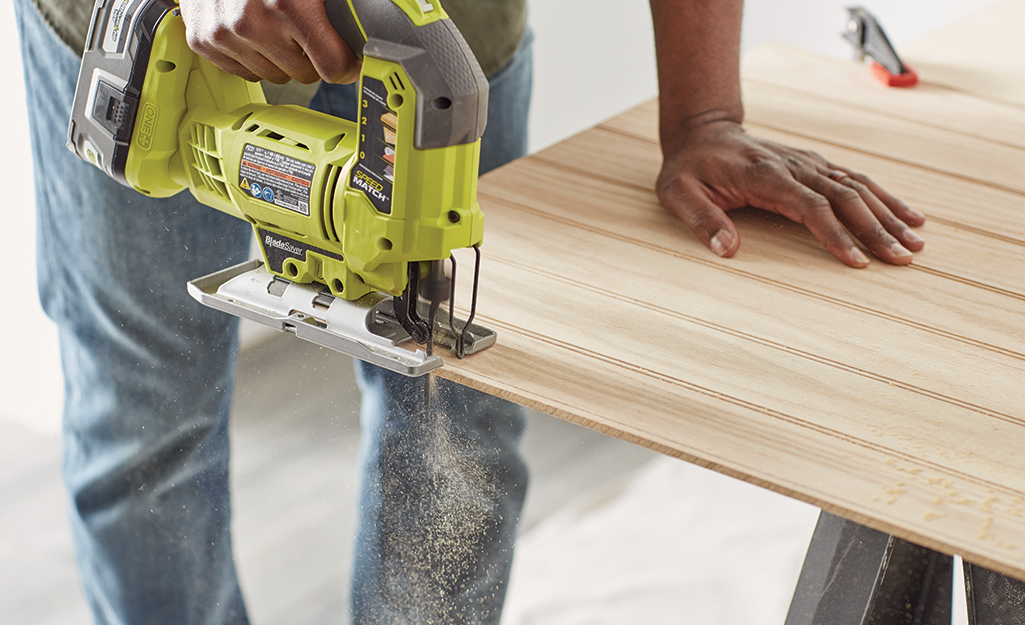
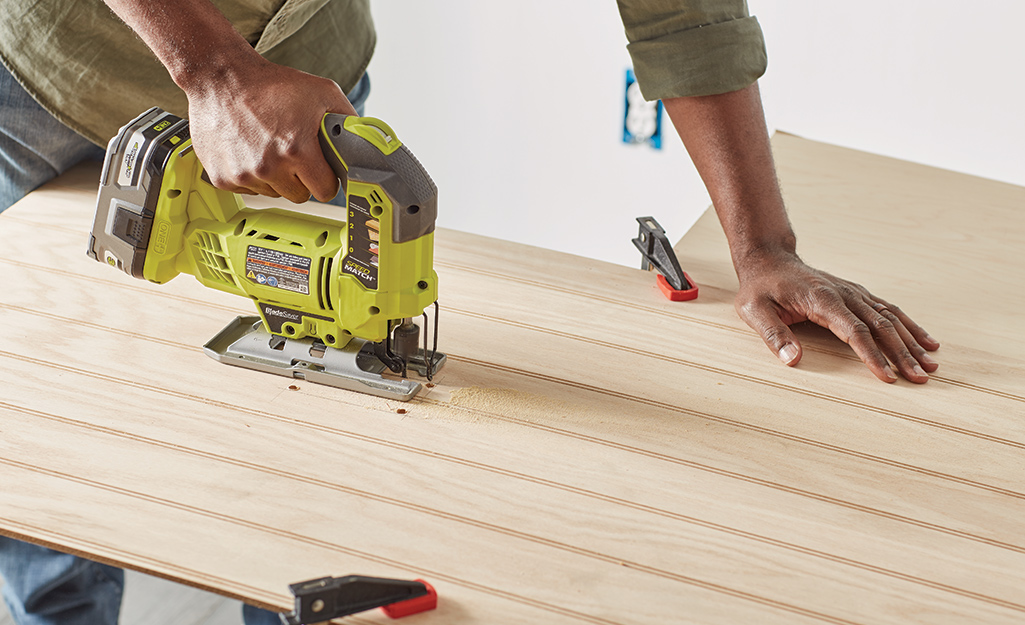
4 Trim to Fit
Trim each panel as necessary to fit or stay level. Use a fine-toothed saw blade to avoid splitting and fraying on the front of the panel.
Tip: All panels should be trimmed 1/4-inch shorter than the ceiling to allow for contraction and expansion.
5 Cut Openings
Make cutouts for wall plates, outlets or electrical boxes in panels as needed, using a saber saw equipped with a fine cutting blade.
Tip: Make a paper template of any openings. Place the template on the panel in the correct location and trace around it with a pencil.
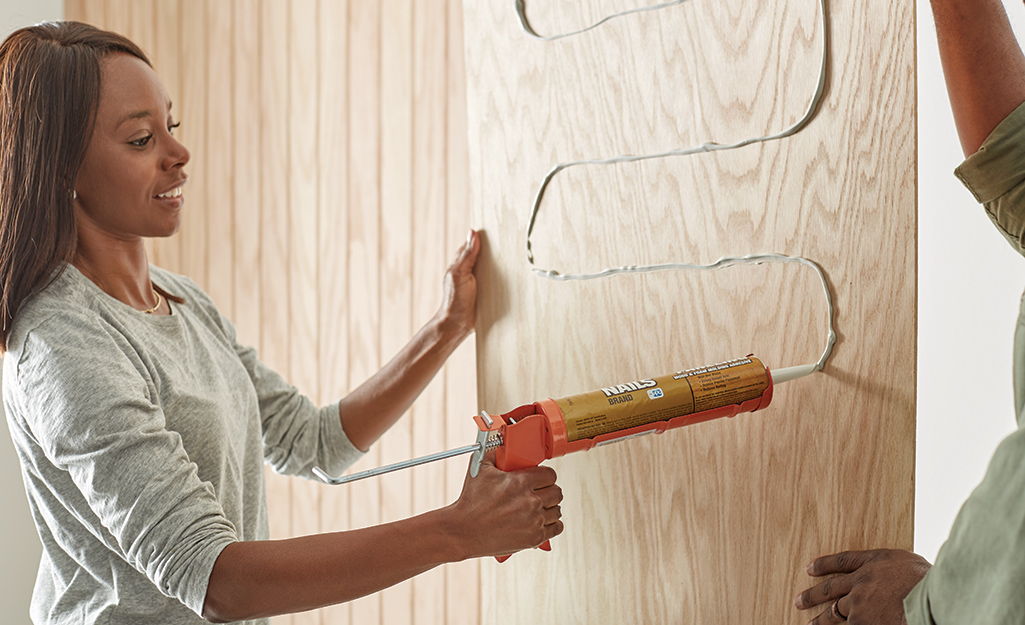
6 Apply Adhesive
Before applying adhesive, arrange all panels in the room and number them. Make sure cut openings line up. Apply adhesive with a caulk gun in a “W” or wave pattern. Position and press the panel into place. Tap in place with a rubber mallet. Repeat until walls are covered. The final step is to glue, then nail moulding into place with finishing nails. Cover them with wood putty for a perfect finish.
Tip: If you’d rather nail the panels to your wall after you've arranged and numbered them, skip to step 7.
7 Use Finishing Nails
Position the panel in place and use finishing nails to attach it to the wall. Use a studfinder to locate studs and nail into those to secure the panel. Continue until all walls are covered and moulding is attached.
Installing paneling is easy, especially when you remember these tips: With unfinished walls, nail paneling sheets right onto the studs or blocks of wood nailed between the studs. When nailing into plastered walls, you may need to attach furring strips first to provide a secure place for the nail to grab hold.
